Creating a new VM by using the Azure Portal is a relatively straightforward process. However, it involves several steps, which you should be familiar with to implement the most optimal configuration. The first step involves choosing the origin of the operating system that automatically installs on the VM. In general, you have the following choices:
- A Windows or Linux operating system image from Microsoft Azure Marketplace.
- A Linux or FreeBSD operating system image from the open source community-managed VM Depot.
- A Windows or Linux operating system image that you uploaded to Azure from your on-premises image repository or captured from an existing Azure VM.
- A Windows or Linux operating system disk that you uploaded to Azure from your on-premises VM repository or captured from an existing Azure VM. Note: The difference between the last two choices might be easy to miss, but it is significant. An image is a generalized copy of an operating system, which allows you to create any number of VMs, each with its own unique characteristics. A disk (in this context) is a nongeneralized copy of an operating system, which allows you to create a single exact replica of the VM that you used to create it.
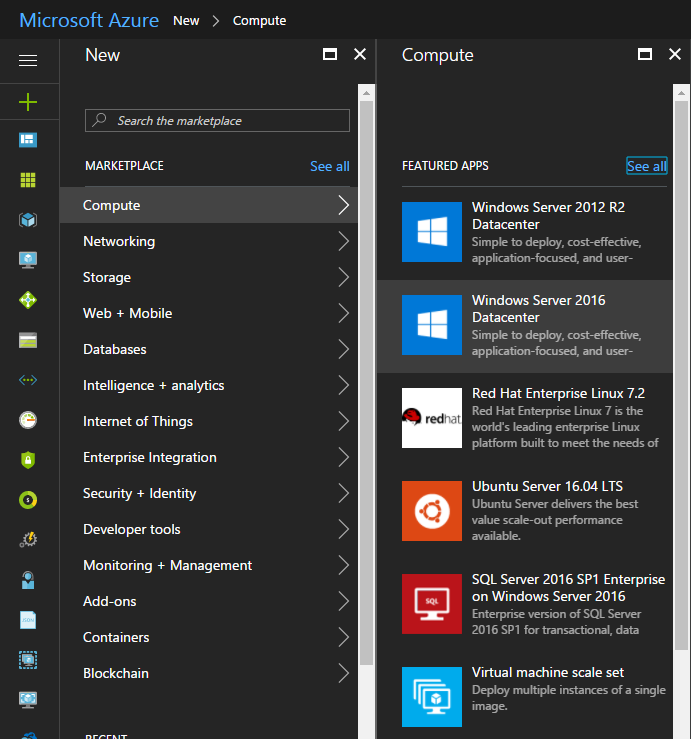
The Azure Marketplace contains images of various Microsoft and Linux operating systems, products, and even ready-to-use multi-server solutions. For example, you can select a basic Windows Server installation or a specific product, which will be preinstalled with the server. Some of the available Microsoft products include:
- Windows Server
- Microsoft SharePoint
- Microsoft SQL Server
- BizTalk Server
- Microsoft Visual Studio
If you are performing a Linux installation, you can select from multiple versions of the following distributions:
- CentOS
- Debian
- Oracle
- Red Hat Enterprise
- SUSE Linux Enterprise
- openSUSE
- Ubuntu
Once you have selected the image, you will need to decide whether to use the Azure Resource Manager or classic deployment model. In general, the recommendation is to choose the first of these two options unless the solution you intend to implement does not support Azure Resource Manager–based VMs.
Creating the Virtual Machine
When you create a VM, the portal allows you to specify the following options:
- VM name. This option matches the name assigned to the operating system instance.
- User name. This option designates the name of the local administrative account that you will use when you manage the server.
- Password. This option designates the password of the administrative account.
- Subscription. This option determines the subscription to which you deploy the VM.
- Resource group. This option specifies the name of the resource group that will contain the VM and its resources (such as virtual network adapters).
- Location. This option represents the name of the Azure datacenter where the Hyper-V systems hosting your VM reside.
- VM size. This option identifies the pricing tier, performance, and functional capabilities of the VM.
- Storage account. This option constitutes the location hosting VM disk files.
- Virtual network. This option identifies the virtual network in Azure to which the VM is automatically connected. This allows for direct communication with other VMs on the same virtual network or other, directly connected virtual networks.
- Subnet. This option identifies the subnet within the virtual network. The private IP address of the VM is part of the subnet IP address space.
- Public IP address. This option allows you to (optionally) provide an Internet-accessible IP address to facilitate connectivity to the VM from outside of Azure.
- Network security group. This option configures Azure-provided network-level access (functionally equivalent to a firewall) that apply to incoming and outgoing traffic. You define these controls by creating a combination of allow and deny rules applicable to specific IP source and destination ranges, corresponding ports, and transport protocols.
- Extensions. This option allows you to configure an operating system and applications that run in the VM after its deployment is complete.
- Monitoring. Once enabled, this option triggers collection of performance and diagnostics data that you can use to track and troubleshoot issues affecting VM workload.
- Diagnostics storage account. This option represents an Azure Storage location where the performance and diagnostics data will reside.
When deploying Linux-based VMs, you can also configure Secure Shell–based (SSH-based) authentication.
While a number of these options might sound confusing initially, the default settings yield the configuration that is ready to use (although it might not be optimal depending on your intentions). In particular, the new VM will have a public IP address and allow connectivity via either Remote Desktop Protocol (RDP) (in the case of a Windows image) or SSH (for Linux distributions) from any system with Internet access. Obviously, the ability to connect successfully to the VM is contingent on the knowledge of its administrative credentials.
Cheers,
Marcos Nogueira azurecentric.com Twitter: @mdnoga

Comments