The NIC Teaming management UI consists of 3 primary windows (tiles):
- The Servers tile
- The Teams tile
- The Adapters and Interfaces tile
![clip_image002[5]](/assets/images/posts/2013/04/clip_image0025.png)
The Adapters and Interfaces tile is shared by two tabs:
- The Network Adapters tab
- The Team Interfaces tab
Each tile or tab has a set of columns that can be shown or hidden. The column chooser menus are made visible by right-clicking on any column header. (For illustrative purposes the screen shot in the picture bellow shows a column chooser in every tile. Only one column chooser can be active at a time.)
Contents of any tile may be sorted by any column. To sort by a particular column left click on the column title. In the picture bellow the Servers tile is sorted by Server Name; the indication is the little triangle in the Name column title in the Servers tile.
![clip_image004[5]](/assets/images/posts/2013/04/clip_image0045.png)
Each tile also has a Tasks dropdown menu and a right-click context menu. The Tasks menus can be opened by clicking on the Tasks box at the top right corner of the tile and then any available task in the list can be selected. The right-click context menus are activated by right-clicking in the tile. The menu options will vary based on context. (For illustrative purposes the screen shot in the picture bellow shows all the Tasks menus and a right-click menu in every tile. Only one right-click menu or Tasks menu can be active at any time.).
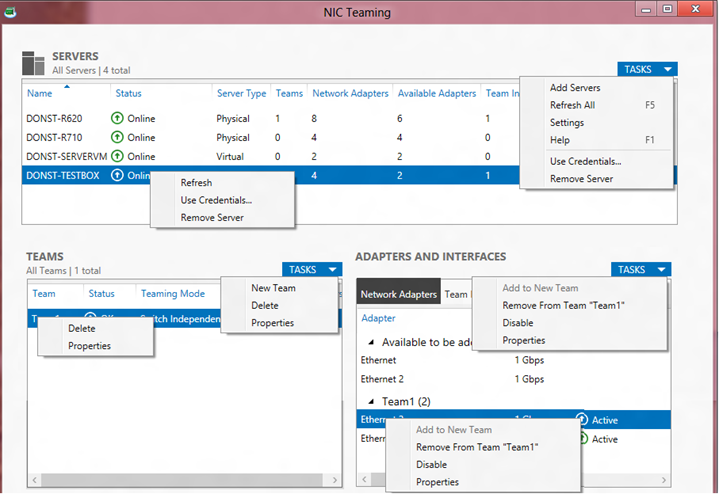
In the picture bellow shows the Tasks menus and right-click menu for the Team Interfaces tab.
![clip_image007[6]](/assets/images/posts/2013/04/clip_image0076.png)
Cheers,
Marcos Nogueira azurecentric.com Twitter: @mdnoga

Comments